We’ve all seen those images that look like something is coming out of the side/top/bottom of a shape giving it a 3D effect. This is called “Out Of Bounds” and is a neat trick to know. Today I’ll be showing you the quick and easy way to do one of these in the round format using The Gimp.
First of all you’ll need to download the duck image from here and fire up The Gimp. Open a new document with the size of 2000 x 2000 pixels. You can certainly use a smaller size if your computer can’t handle working with a large file, I just prefer to go larger for better control and having more pixels to push around.
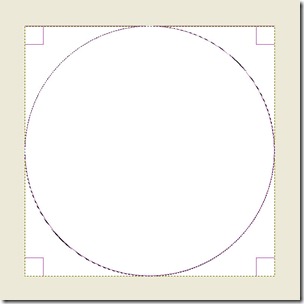
Next we’ll need to use the Elliptical Tool and put a circle that fits within the whole square. Click and drag across your square. Hover your mouse just inside the edges of the square to see bars that you can click on to adjust the size of your circle. We’ll enlarge the square later so we have room to move but right now this is the easiest way to make sure it’s fully centred.
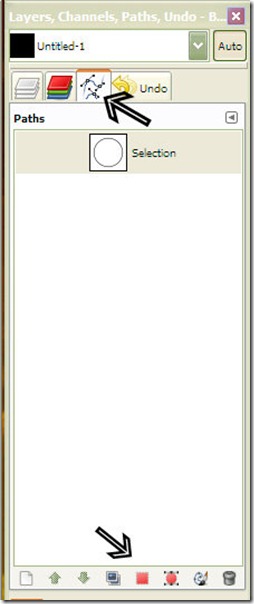
Now that we have a nice big circle to work with we’ll need to save it as a path in case we need to turn off the selection and bring it back later. To do this click on the Paths Tab (top arrow below) and then the Selection to Path icon which is the little red circle icon on the right at the bottom of the tab.
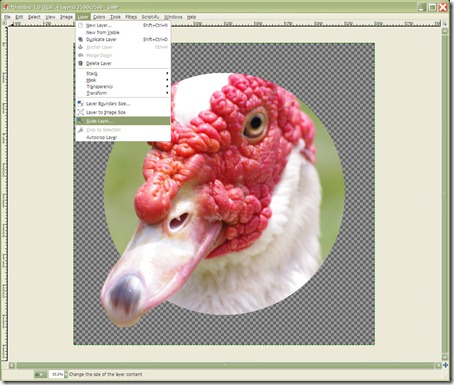
Now that we have the circle saved we need to make some space for the rest of the image. Click on your Layers Tab again and right click on the layer called Background. Choose Scale Layer and with the box that turns up change the Width & Height to 2500 pixels and then click on the Scale button. Once that is done go to Image > Fit Canvas to Layers.
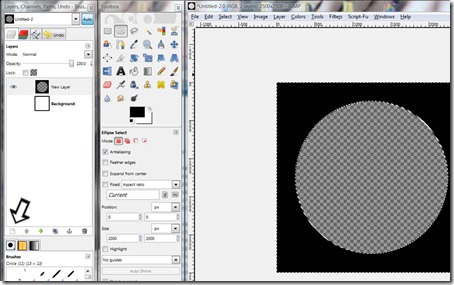
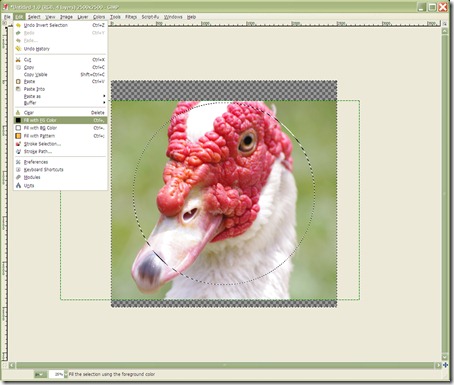
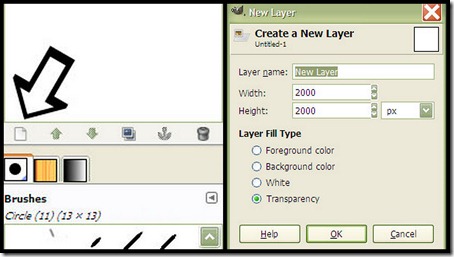
Now we’re going to create a “frame” layer so we can make sure our duck is properly framed. Click on Select > Invert. This changes the selection from the circle itself to everything outside the circle. Now click on the New Layer icon in your Layers Tab (arrow above) then click on Edit > Fill with FG Colour. This will give you a layer with a black border and transparent circle inside so you can frame your picture. You could skip this step but I have found it very useful in the past.
To frame your duck you will first need to choose Select > None so that you can move the whole layer and not just what is selected. Next lower the transparency of your black frame layer so that you can see all of your duck and using the Move Tool, click inside the circle to move your duck around until you are happy the results. You could also do the opposite by moving your duck layer above your black frame layer, lower it’s transparency to see the layer below and then move it to where you are happy.
Once you have your duck where you want it, click on the little eye next to the black frame layer to turn it’s visibility off. Before we start the next step we need to duplicate the duck layer for later by right clicking it and choosing Duplicate Layer. Click on the eye beside the lower duck layer and hide it for now. Now to remove the excess part of the duck image on top. Click on the Paths Dialogue tab where we saved our circle. Click on the red square icon on the bottom called ‘Paths to Dialogue’ (hover your mouse over if you’re not sure and a name tag will pop up). This should bring our circle selection back up. Click on Select > Invert. Now right-click on your top duck layer and select Add Layer Mask. Choose Edit > Fill With FG Colour. This will crop your circle including the part that will stick outside the circle but don’t worry as we’ll bring it back in the next step.
Now it’s time to bring back the beak. First of all we’ll need to unhide the duplicate layer we made before by clicking on the eye. Lower the opacity to around 50%. This will allow you to see where the beak is situated. Go back to your top duck layer and choose the Eraser tool from your Toolbox.
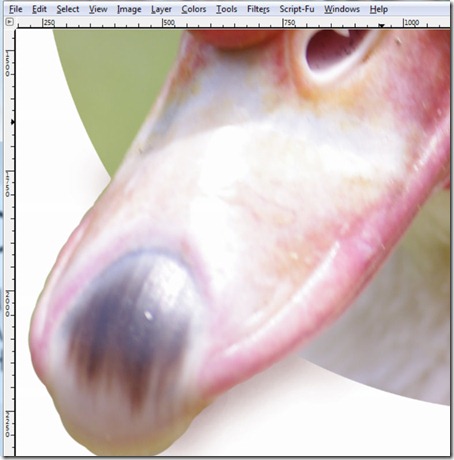
Choose a soft round brush and make sure you have black set as your foreground colour. I used a simple saying to remind myself which one to use in a layer mask; ‘White to Erase, Black to Bring Back’ and as we’re going to bring back the beak we’ll keep it black. With your brush scale (size) set to a small size (4 or below) start clicking around the edge of the beak that you can see with the transparent layer. Once you have the edge back you can use a larger brush to fill in the inside. Eventually your beak should look like the image below.
Ok, now we only have two more things to take care of. The border and the shadows. To start with we’ll need to create three layers.
On your Layers Tab, click on the New Layer button (above left) which will bring up the dialogue box. Make one transparent and two white new layers. We’ll work with one white layer first. Go back to your Paths Tab and bring back the circle and invert it as we did for earlier layers. This time instead of adding a layer mask go Edit > Cut. This should leave you with a white circle. Now go Select > None. Right click on your white circle layer and select Scale Layer. Change the width and height to 2600 pixels and click on Scale. Move this layer to below your duck layer and you’ll notice that you have a nice white border to your image. You can of course set the width to anything you like by experimenting with your resizing.
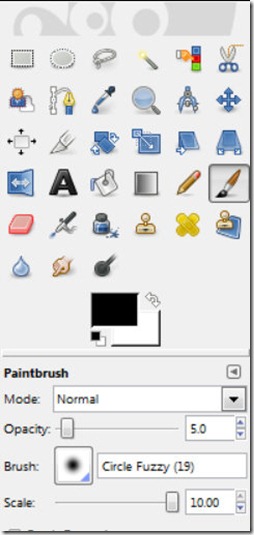
Now for the last step of putting a shadow underneath the beak. Move your transparent layer to between your white circle layer and duck layer and the second white layer underneath all of these. It’s only there so you can see your shadow emerging. This is where your shadow will live. Select your paintbrush and set it to the same settings and brush that you see above. To make your shadows look a little more realistic you could change the colour to a dark brown. You can do that by clicking on the colours box.
Before you start putting in your shadow, make sure that you have selected your transparent layer. You can click directly onto the beak and as the transparent layer is underneath you wont see it. I always start gingerly until I can see how well the shadow is coming. Don’t fret if you make a mistake as you can always delete that transparent layer and put a new one in and start again. When your shadow is done you can put in a textured layer such as a brick wall to make your duck image look cooler or you could even lose the background, save your file as a PNG file and have it printed on a coffee cup or Tshirt for your Dad.
And that should be you finished with your Out-Of-Bounds Duck. I hope you feel you have learnt something from this tutorial. Feel free to leave a rating or comment below and don’t forget to share it with your friends.





No comments:
Post a Comment